Tag: plumbing

Architecture & Building

What are MEP plans? And why you might need them  

What is am MEP in construction?  

MEP stands for mechanical, electrical and plumbing. MEP engineering is the science and are of planning, designing and managing the MEP systems of a building.  

  • M – the mechanical design elements of a property, such as the heating and cooling system are important because they make the inside comfortable. This makes it so you can live in buildings in all weather conditions, hot and cold.  
  • E – the electrical system keeps all the lights and power going, it also powers the other systems. Architectural lighting plans are key component of the electrical engineering process.  
  • P – finally, the plumbing system provides fresh water for cleaning, drinking etc. They also take storm and wastewater safely away.  

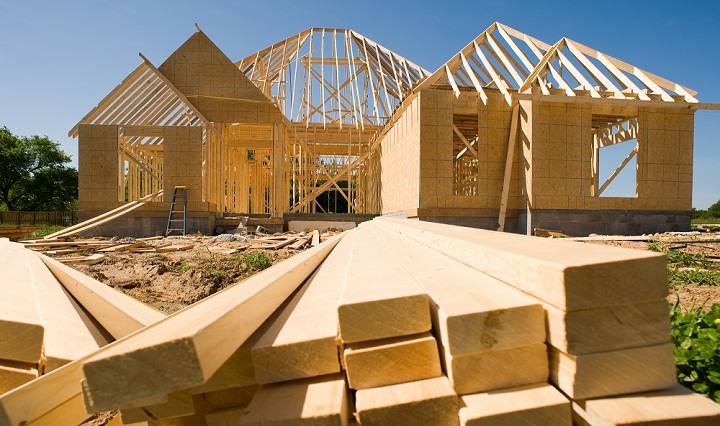
What’s in MEP drawings?  

These types of drawings are created by combining architectural, structural, and civil shop drawing for a project. These types of drawings smooth out the manufacturing, installation, assembly and maintenance of the MEP in a building. Contractors use these drawings to get precise specifications and identify faults before construction starts.  

The drawings provide construction cost saving approximately 30%, along with the improvement in the building delivery schedules to over 40%.  

Benefits of using a MEP engineering company –  

Working with an experienced MEP engineering company has several benefits:  

  • It can optimize material needs to lower installation costs while maintaining excellent performance and code compliance.  
  • Because of the high level of interaction between MEP systems, they are usually built jointly. This unified approach eliminates equipment collisions, prevalent during the separate building of mechanical, electrical, and plumbing systems separately. 
  • Joint designs enable the effective utilization of space. 

What is the importance of the drawings?  

Furthermore, they provide important systems of checks and balances during the construction phase of a project. The purpose is to ensure the end result keeps to the design shown in the construction documents, and meets the expectations of the owner.  

Architecture & Building, House Renovation

An Informative Step By Step Guide To Building A New Home

Looking to build a new home but don’t know where to start? this step by step guide is a perfect way to understand the process of the construction

1. Prepare the construction site 

Firstly, before any construction can happen, the local government must approve the design and provide permits. You will need these permits for everything from home construction, electrical work, plumbing, and planning. Once the permits are required, construction can begin.  

Often site preparation and foundation are performed by the same people. The crew clears the site of rocks, debris, and trees. They then level the site, put up wooden forms to serve as a template for the foundation, and dig holes and trenched. The footings are then formed and poured, as well as the foundation walls. The areas between them are levelled and fitted with plumbing drains and electrical chases; then the slab is poured. Once all of the concrete is set an inspector will visit the site to make sure the foundations are up to code and installed properly. 

2. Complete rough framing  

The floor, walls, and roof systems will all be completed. Usually, plywood sheathing is applied to the exterior walls, roof, and windows and the exterior doors are installed. It is then covered with a protective barrier known as a house wrap. This prevents liquid water from infiltrating the structure. This also reduces the likelihood of d rot.   

3. complete rough plumbing and electrical 

Once the shell is finished the roof can be installed and the following are installed: 

  • Pipes and wires 
  • Water supply lines 
  • Sewer lines and vents  
  • Bathtubs, shower units 
  • Ductwork for HVAC system 
  • HVAC vent pipes 

Once all of the things are installed you will need to have a few more inspections. 

4. install the insulation  

Insulation plays a key role in creating a more comfortable, consistent indoor climate and improving the home’s energy efficiency. The most common types of insulation used in new homes are fiberglass, cellulose, and foam. Most homes are insulated in all exterior walls, as well as the loft and floors.  

5. Complete drywall and the interior fixtures, start the exterior fixtures 

The next step is to hang the drywall and make sure it is taped so the seams are not visible. After the taping is complete the primer coat of paint is applied. Then the contractors will begin installing the external finishes such as brick and stone. 

6. finish interior trim, install driveway and walkways  

All of the interiors get completed and this includes doors, baseboards, window sills, cabinets, vanities, fireplaces, and much more. The walls get the last coats of paint and the wallpaper is applied.  

Generally, the driveway, walkways, and patios are formed at this stage.  

7. install hard surface flooring and countertops  

Ceramic tile, vinyl, and wood flooring are installed as well as the countertops.  

8. finish mechanical trims 

Light fixtures, outlets, and switches are installed and the electrical panel is complete. All of the bathroom fixtures are also installed such as sinks, toilets, baths, and showers.  

9. install finishing touches  

Mirrors, shower doors, and carpet are installed and a big final clean-up takes place. They also complete the landscaping by adding trees, grass, and shrubs  

10. The final walkthrough  

The final step is a walkthrough, your builders will show you and acquaint you with your new home, the features, and the operation of some things. This is also an opportunity to spot items that need to be corrected or adjusted. And also, to check there are no possible damages to the countertops or walls.  

Discover How to Avoid Budget Blowouts when Building a Home | BBBLOGS®
Building a new home

Contact us