Tag: building

Advice Center

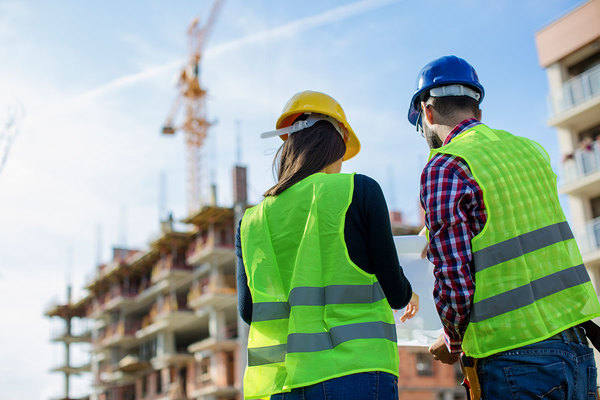
What Season Should You Start Construction Work? The Ultimate Guide

Looking to start construction work but are not sure when the best time of year is? This blog will help you decide.  

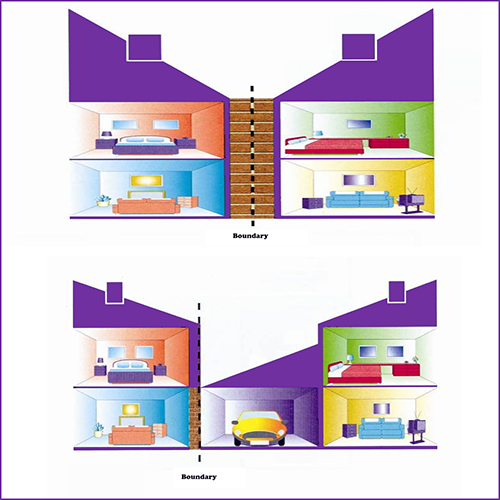
The climate is the biggest and most important factor when it comes to construction. This is because it determines the materials you can use and the longevity of the work.  

Autumn – Winter Construction

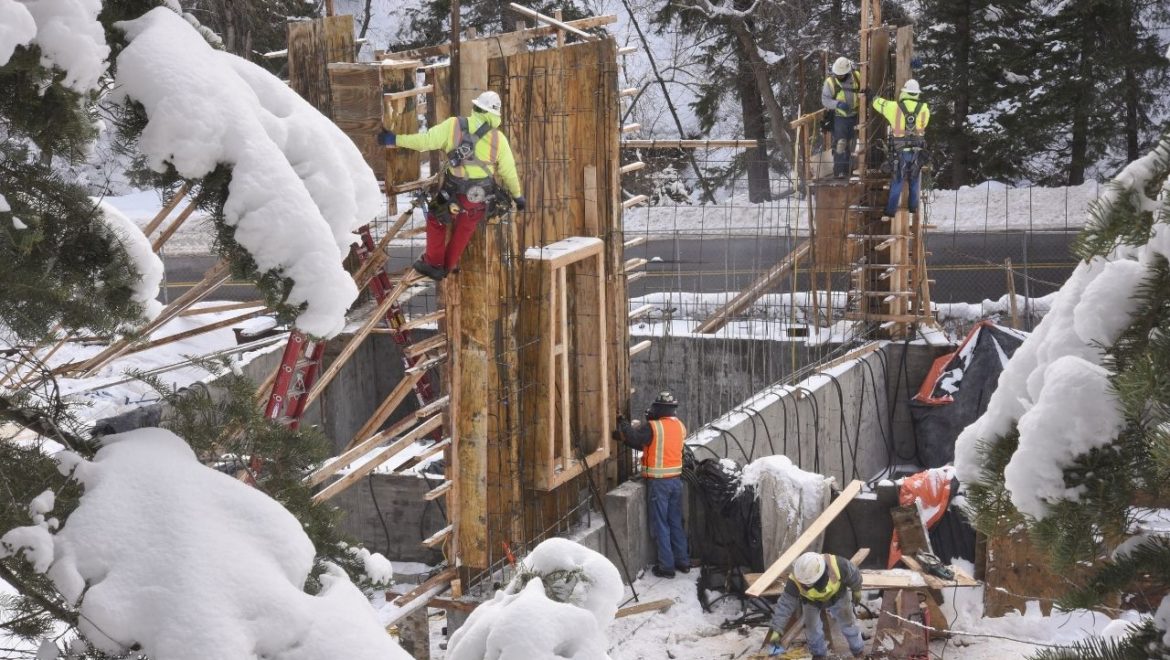
The autumn and winter periods are a classic time for dangerous construction sites. many accidents happen because the ground is often slippery and wet. Workers also need to dress up warmly and wear extra padding, this leads to having less mobility which leads to accidents. You also need to watch out for the water and electricity and make sure they do not come in contact. Because the site can become a death trap if it is not managed properly.  

Thunderstorms –  

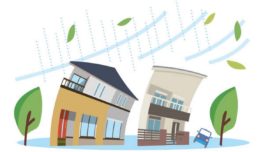
Thunderstorms and heavy rains cause a lot more damage to a build than expected. If there are high winds materials being used in the construction can be destroyed or damaged. And if it is hailing it can easily break glass and can dent sheet metal.  

Moisture –  

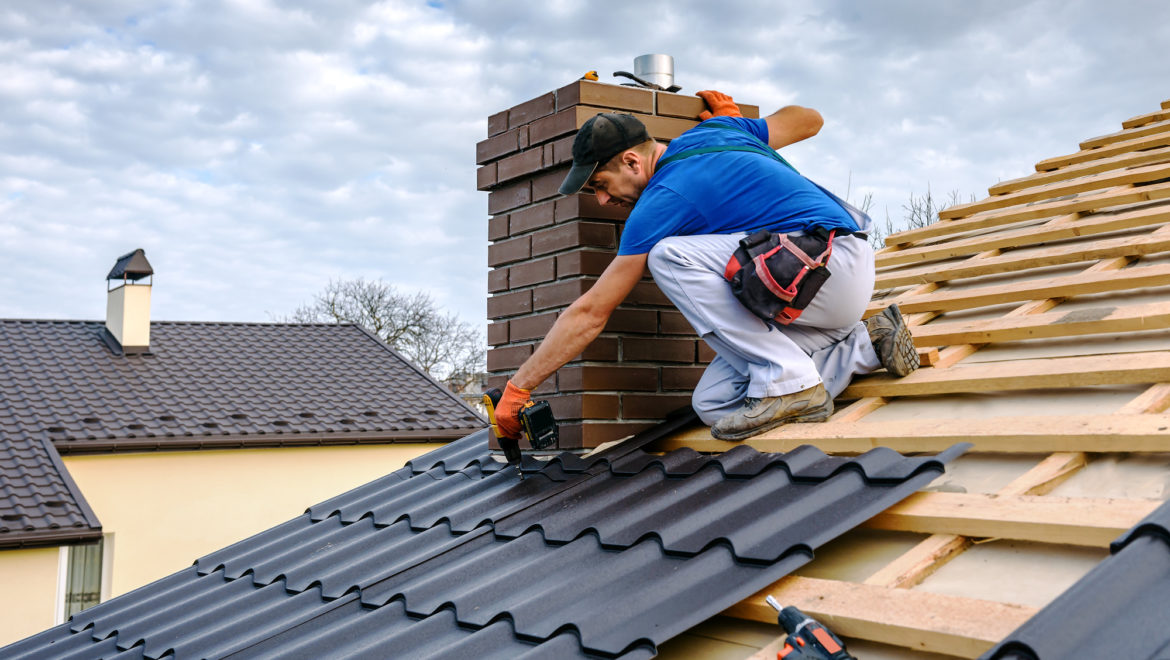
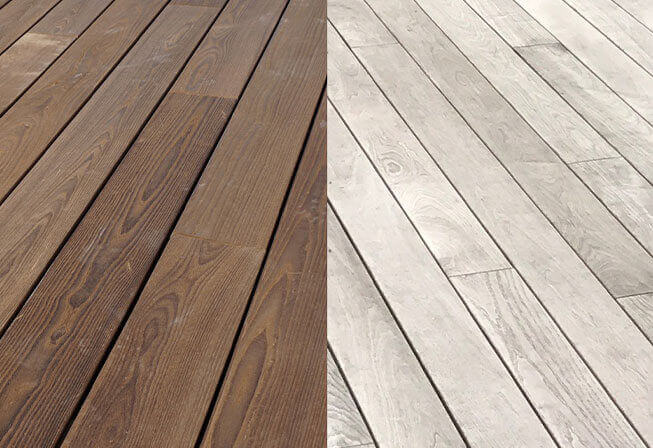
Moisture is very bad when it comes to construction it can lead to accumulating Mold in the environment. The metals used in the construction such as iron and steel will be accessible to rust. If you are working with wood, even when it is cured it is still open to moisture. Bricks are one of the first building materials that is immediately affected by moisture during construction.  this is because it traps the moisture in the tinner walls and it could be released at a later date. 

Extreme Cold –  

Materials contract in extreme cold, so applying paint and glue to surfaces on these days will lead to cracking and wrinkling. Concrete and cement will also form ice particles and this drastically reduces strength and stability.  

However, building in cold climates is not a new thing and cold counties have successfully overcome all issues. Because they use specially adapted materials, additives, and application processes. 

How Does Weather Affect Construction? |
Image: Abode By Patrick

Spring – Summer Construction  

You may think because the weather is getting warmer it is for the better, however, moisture is an even bigger issue in spring.  
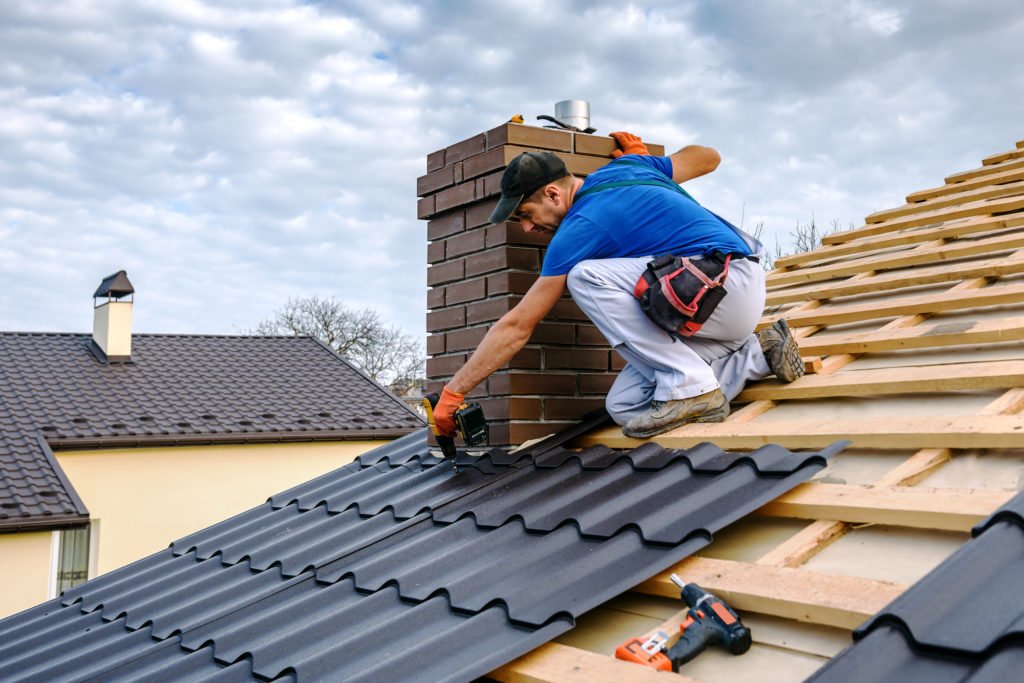
Heat – 

The heat can be just as big of an issue as the rain. Heat changes the expansion dimensions of materials and this may lead to misaligned joins during the construction. The heat also causes workers to be less careful, wearing less protective clothing and causing drowsiness due to heat fatigue. 

It has shown that preparing concrete on hot days without adding in extra water requirements will lead to weaker applications. Bricks in the heat can also become brittle and, pain, when applied, might crack as well as discolour.   

Construction Workers
Image: Stock.adobe

Just like the colder season building in hotter seasons have its own issues and many countries manage to develop methods and tools that work for the climate. However, it is clear to see that it is better to start construction in the spring-summer months compared to the autumn-winter months.    

Contact us

Building Control

Building Control: Things You Should Know

Below is about building regulations and the things you should know. 

Why do we have Building control?  

The building control service is to ensure the health and safety in a built environment. They cover a lot such as stability of the building, insulation, ventilation, fire protection and fire escape. However, there are other precautions they take as well. Depending on the project you may be spared from some regulations however, you should always follow and comply with the building regulations. Building regulations will apply if you’re wanting to: 

  • Build a completely new property. 
  • Extend or change existing property. 
  • Provide services in a property.  

Building control regulations  

  • A: Structure  
  • B: Fire safety  
  • C: Site preparation and resistance to contaminants and moisture 
  • D: Toxic substances  
  • E: Resistance to the passage of sound 
  • F: Ventilation 
  • G: Sanitation, hot water safety and water efficiency  

Part A: Structure  

Firstly, this regulation requires that the building is structurally safe and stable. Part A stipulates design standards for use on all buildings and gives simple design rules. 

Part B: Fire safety  

This covers all fire measures to keep the people in the building safe. In addition, the requirements cover escape, fire detection and warning systems. There are other requirements that need to be followed under fire safety.  

Part C: Site preparations and resistance to contaminants and moisture. 

Includes weather and water tightness of buildings, subsoil drainage, site preparation and measures to deal with contaminated land and all other site related hazardous and dangerous substances. 

Part D: Toxic substances 

Finally, the control of hazards from toxic chemicals used in insulation.  

What happens if you fail to comply with building regulations? 

If you fail to follow the building control regulations your local authority has the duty to take action. For example, by taking you to magistrate’s court. Your local authority can also make you demolish your work. Usually but not always the builder, installer or main contractor would have action against them. You can be prosecuted for up to two years after the completion of the project. 

Difference between building control and planning  

Building regulations sets safety standards for the construction of buildings. These requirements cover fire safety, health, fuel and power. Whereas, planning is seeking permission to do building works. The planning requirements are to make sure your plans do not affect you, your neighbours or the environment. Both have more requirements that need to be followed. These are separate processes. 

Picture: Getty

Contact us

Advice Center

An informative step-by-step guide to installing a roof

This step-by-step guide will show you how to install a roof. It will also list tools and items that you would need during this project.  

List of tools required –  

  • Caulk gun 
  • Air compressor 
  • Circular saw 
  • Roof harness  
  • Roofing Nailer 
  • Scaffolding  
  • Stapler  
  • Utility knife  
  • Cordless drill 
  • Tape measure  
  • Chalk line 

List of materials required –  

  • Felt underlay  
  • Asphalt shingles  
  • Roofing nails  
  • Drip edge  
  • Hook blades  
  • Sealant 
  • Waterproof underlay  
  • Staples  
  • Step and dormer flashing  
  • Valley flashing  
  • Vent flashing  

Step 1: installing the ventilation system  

A rafter roll is usually laid across the eaves and is designed to guide fresh air into the roof. It also allows air to circulate around the space to prevent dampness.   

What is a rafter roll? 

A rafter roll is a glass mineral wool roll. Designed for use in warm roofs where the roof is insulated at rafter level. It offers excellent thermal performance.  

Make sure the rafter roll comes out above any pre-installed insulation. If you don’t the insulation will block the airflow.  

Step 2: installing underlay  

To protect the roof against ice, wind, and rain you should install a good underlay. You need to make sure the underlay you have chosen meets the building regulation requirements for your project. So, to install the underlay you should start on the right side of the roof and tack it into place. Depending on your ventilation system, you may need to leave a gap at the ridge of the roof to allow air to circulate effectively.  

Step 3: putting in the battens and tiles  

You will need to determine the first fix point on the roof for your tiles, and that’s where the top of your first batten will sit. In addition, make sure you use the right size timber batten for your roof tiles. Line up the top of the batten with the chalk line and fix with a nail to every rafter. After that, to keep the ridge batten secure you must use batten straps to keep it in place.  

What is a batten?  

A Batten is a small section of timber or steel that provides a means of supporting, positioning, or fixing roof cladding and ceiling sheets. A Tile batten is parallel to the eaves line and at right angles to the rafters to which tiles are fixed

Next, you should lay your first line of tiles across the roof. Then, make sure that you have a minimum of one nail per tile and two nails per tile around the perimeters. You should time from right to left, depending on the interlock of the tile.  

Finally step 4: adding the roof ridge 

You should place your ridge membrane in a straight line across the ridge batten. Once it’s secured all along the ridge, it’s time to screw the ridge tiles to the ridge batten. Finally, when that is completed, you can install a ridge-to-ridge seal to offer extra strength to the ridge.  

Contact us

Materials

The advantages and disadvantages of thermally modified wood

Thermally modified wood definition – 

Thermally modified wood is wood that has been modified by a controlled pyrolysis process of wood being heated. In absence of oxygen inducing some chemical changes to the chemical structures of cell wall components in the wood in order to increase its durability. 

How to modify the wood –

The wood is placed in a chamber and is gradually heated to 210 – 230 Celsius, and completely void of oxygen to prevent combustion.

The purpose of the wood –  

The bending strength of the wood is reduced during the heating process. So, thermally modified wood is not suitable for structural applications. It is commonly used for non-load-bearing applications such as decking, flooring, wall paneling. As well as ceilings, accent walls, and interior and exterior doors.  

the sustainability of modified wood – 

Going green has never been more crucial than it is now. The process of thermal modification involves zero chemicals, eliminating the harsh toxic substances, that are often in building materials. Sourcing the wood carefully and thoughtfully, while thinking about how to best optimize performance is key for sustainable growth.  

Advantages and disadvantages to using this wood –  

Advantages –  

  • Free of chemicals  

This process only heats and cures the wood. There are no harmful chemicals or toxins that go into the process. Chemicals in wood are dangerous to touch and breathe but you won’t have to worry about that with this wood.  

  • Sustainability  

The modification process will naturally create longer-lasting wood, which will lead to less deforestation in the future. Although, this is contributing to a sustainable building future. 

Disadvantages –  

  • More expensive  

As well as, the original lumber, you will also be paying for the modification process. However, the price will also depend on where you live and the type of wood that you use.  

  • Becomes brittle  

After heating the wood to such a high temperature, a popular complaint is that the wood becomes brittle. This has people wondering how stable the wood can actually be.  

  • Could burn faster 

Due to the low moisture content, the thermally modified wood could end up burning quicker and easier.  

Americana™ Thermally Modified Wood Decking

Contact us

Advice Center

Building a bungalow: the pros and cons

In the UK bungalows are one of the most sought-after types of home, but they seem to be the most unavailable. Many homeowners have said that this type of property is the ideal place to live. This is why many home buyers are thinking of building a bungalow themselves.  

Designing a bungalow – 

When building any home making sure that it gets a load of daylight is a major priority to many people. Bungalows are usually wide, so you need to make sure that sunlight reaches nearly everywhere on the property. 

 A way to make sure that you can get a lot of light and to make your space more modern is by making an open plan bungalow. An open-plan area is great for bungalows because it can make the space feel bigger and airier.  

A great feature to add to the design of your project is a lot of glazing. You could have tall vaulted ceilings and add a number of skylights to make the place look more luxurious. Installing bi-fold doors is also a great thing to think about when designing a home. They provide the sense of bringing the outside in and are a great choice if you like to entertain because they open up the area.  

Pros and cons of building a bungalow –  

Pros –  

  • Space and privacy  

Bungalows generally come with more space because they are wider than a traditional house. This means that their plot is bigger and there is more space between neighbours, so you end up getting more privacy. Having other bungalows next door to you often means that there will also be fewer people overlooking your property.  

  • Great for all types of people  

One of the biggest pros of a bungalow is that they are suitable for everyone. Because there are no stairs this property is great for the disabled, the elderly, and children. Without a second floor, it is easier for people to get around their homes and do things independently.  

  • Less maintenance  

A reason why older people go for bungalows is that they are a lot less maintenance than owning a larger home. It is smaller property meaning it would be easier to clean.   

Cons –  

  • High demand, low supply  

Bungalows are hugely popular but there are fewer and fewer being built.   

  • Lack of sleeping separation  

A thing that some buyers dislike is that there is a lack of separation between the living areas and the bedrooms. This can be an issue for those who are sleeping and those who are awake making noise.  

  • Security worries  

Most people sleep with their windows open, but this can cause security worries for those living in a bungalow. It may be best to install a security system if you’re thinking of building a bungalow.   

How much do bungalows cost to build?  

Bungalows then be more expensive to build and they cost more per square foot than two-storey dwellings with the same number of bedrooms. The total average cost of building a bungalow can range anywhere between £181,000 and £552,000. The cost of a bungalow is heavily influenced by land costs and the size of the plot.  

Advice Center, Architecture & Building

Top things to consider when building a home for the disabled

There are a number of disabled people that are living in a home, made for an abled person. By living like this it can make their life and day-to-day tasks a lot harder. This is why it is important that more disability-friendly homes are being built.  

A disability-friendly home should ensure independence for homeowners or family members with a disability. Whilst also allowing freedom of movement and comfort for all of the family members and visitors.  

Here are the top things to consider when building a home for the disabled:  

Wider doorways – 

One of the first things that you need to consider is building wider doorways so that it is easier for wheelchair access. For wheelchair users to comfortably navigate within their homes, it’s essential that doorways must be at least 32 inches wide.  

It is also better to use lever door handles because knobs can be difficult for people with dexterity problems. However, even if you don’t have a disabled person within the property, these features are still the most practical. Wide doorways are also growing in popularity which is a great thing for the future.  

The correct flooring – 

Flooring can actually affect the way people with certain disabilities live. Here are some options of flooring:  

  • Hard wood floors are very useful for people who use wheelchairs and walkers, because it is slick for the wheels.  
  • Vinyl floors are a popular choice because they are affordable and are known to be slip resistant.  
  • Carpeted floors provide softer cushioning which is great for people who suffer from joint pain. This is because having a softer floor helps to avoid aggravating the pain.  

Safer bathrooms –  

Bathrooms have proven to be the most difficult area in the home to access. It is important to give the bathroom more space than you would for an abled person. This is so there is more mobility for those who need it, this is why wet rooms are popular within these houses. If you don’t have a wet room or a shower, adding a bath lift will help you get in and out of the bath easier.  

It is crucial to use slip-resistant floor tiles so there is less chance of falling over. Installing hand railings where necessary will also help to provide stability when in the bathroom.  

Security –  

Adding an intercom or alarm system to the property can be very important because it could end up saving someone’s life. If someone falls, they could set off the alarm, and help can be on the way. You should also think about installing outside lights just for extra safety.  

Driveways –  

Driveways for disabled-friendly homes should be about 3.8 meters in width and 5.4 meters in length, maybe even bigger. This is because they need enough room when getting in and out of the car. There should be a wide flat path between the front door, with no plants or trees in the way. Having ramps and slopes is a must in these types of homes so that they are accessible to everyone.  

Contact us

Architecture & Building

How to convert a commercial property to residential?

Converting a commercial property into residential is becoming increasingly common within the UK. Although this market continues to show potential, it’s still essential you learn how to successfully convert a commercial property.  

Step 1 – check if there’s an exception 

A lot of commercial buildings are now eligible to be converted to residential. However, there are some exceptions, for example:  

  • Listed buildings 
  • Buildings within conservation areas or national parks  
  • Properties within areas of natural beauty/ scientific interest.  
  • Buildings within safety hazard areas  

If you are unsure if your property is one of those then it would be best to check. In addition, some of the examples might be acceptable to convert, but you would need to apply for full planning permission.  

Step 2 – identifying the buildings use class

All of the buildings in the UK are placed in a use class. Some of the classes include: 

  • A class – shops, restaurants, and businesses that provide professional services.  
  • B class – offices, storage facilities and warehouses 
  • D class – schools, doctors, cinemas, and other leisure facilities  

In order to convert a commercial building, you will need to apply to change the use class.  

Step 3 – budget  

Before you even think about looking on the market for properties, you need to work out how much you can afford to spend on your project. It is also smart to over budget, just in case of any unexpected additional costs.  

Step 4 – planning permission  

Some of the conversions won’t require planning permission. However, the buildings must be 150 square meters or smaller, if your plans include changing the appearance of the exterior or extending then you may need planning permission.  

Step 5 – finding the property 

Commercial to residential conversions offers a lot of profit potential. It is important to think about what you can do with the property after the conversion. For example, if you’re renting make sure there are plenty of interested tenants, and that you are able to make enough profit. Before you buy you should also look into the surrounding area and see if you like the place.  

Advantages of converting commercial to residential –  

  • Prices are competitive – many commercial properties remain empty, which has forced property owners to ask for less. 
  • Commercial properties are usually located in popular locations. This will be very attractive to the growing tenant demand.  
  • You can turn commercial properties into HMOs. Which is a great investment.  

Contact us

Extensions

Everything you should know before building a Flat roof

Flat roof extensions can provide a simple, cost-effective solution that ticks all of the right boxes. Especially for smaller extensions.  

What is a flat roof? 

A flat roof is a roof that is completely or almost level. However, whilst they are described as flat almost all flat roofs are laid to slope so that rainwater can run off to the lower side. The slope of the roof is properly known as its pitch. 

Where flat roofs originally from –  

Flat roofs are an ancient form mostly used in desert climates. Flat roofs exist all over the world, and each area has its own tradition or preference for the materials used. For hotter climates, where there is less rainfall many flat roofs are simply built out of masonry or concrete. This is because it is good at keeping the heat out, it is cheap and easy to build. Flat roofs are characteristic of the Egyptian, Persia, and Arabian styles of architecture.   

The main thing flat roofs are used for is extensions. They are exceedingly popular with those looking to create a cool, modern home. Flat roofs help to free up internal space and are often cheaper than a pitched roof. It is also easier to incorporate a green roof onto the structure if you want to go for an eco-friendly version.  

Pros and cons of flat roofs –  

Pros  

  • Installation & Maintenance – flat roofs are fairly easy to install. The maintenance is also easy because there is no fear of sliding off the roof when it comes to fixing it or cleaning the gutters.  
  • Price – the flat roof is generally a less expensive option. A flat roof requires less materials for the construction, and the materials are cheaper than tiles. They also take less tome to install.  
  • Internal space is not imposed on – the lack of pitch means that you don’t have to extend your property upwards, and maybe block some views. You can also put things on top of the roof and create a roof top garden  

Cons  

  • Temperature change – flat roofs absorb heat easier than flat roofs, because they are constantly absorbed by the sun. In the summer this can make your house very hot, however, in the winter it does the opposite and makes your house cold.  
  • Roof repairs – they are usually more expensive than a traditional pitched roof.  
  • Drainage – flat roof drainage is not as effective as pitched roofs and flooding can become an issue.  

Contact us

Architecture & Building

The Top Materials To Use If You Are Building A House

Are you looking to build a new home but are unsure on what materials to use? This blog will tell you all of the best materials you should consider.  

Wood –  

Wood is normally used when building the inside and structure of the house, it isn’t really used for the outside. This is because it can absorb dampness and some wood attracts bugs. However, the popularity comes from its affordability and it is lightweight and easy to work with. It also acts as an insulator, which keeps the cold air out and the warm air in. Wood can also be an eco-friendly option when brought from a responsible supplier. Wood has a lower carbon footprint than other materials, using less energy to produce.  

Wooden Houses, Log Cabin, Timber House with Free Design | InGreen

Concrete –  

If you are looking for a material that is both strong and cost-effective then concrete would be the best option. Concrete is a mixture of sand, stone, and water, which then dries and hardens. Because it is so strong, the material can be used to support entire structures. In addition, concrete buildings are low maintenance and they last for a long time. Concrete is also very energy-efficient, it is able to transfer heat absorbed during the day and release it at night when it’s cooler. This may cost the building owners less in the future.  

Luxury modern concrete house in Trento [ Timelapse ] - YouTube

Steel –  

Steel is the strongest material to withstand any structure. It is also a very eco-friendly material to use because it doesn’t pollute the air and it doesn’t affect and involve cutting any trees down. Having a steel structure can make it much safer if there are any natural disasters that strike, it is the most secure structure. Because steel increase durability and longevity, it will be a more costly material.  

Light Gauge Steel Framing for Housing - Hadley Group

Brick –  

Bricks are one of the most durable building materials that are used in construction. If you are looking for your building to withstand time, then brick may be the best option. Buildings made from bricks tend to retain their value over time, for example, the great wall of China. However, when using bricks, you need a solid base to make them safe in cruel climate conditions.  

Can You Render Over Brick? The Full Truth! | Home Logic UK

Stone –  

Stone is another material that has been used for centuries and it has been proved to hold up over time. Many people like to use stone because of its unique appearances. You can go for the style of its aw form for a rustic look or a more finished form for a modern style. It is also durable and is able to protect homes from environmental threats.  

Gallery | Bricklaying and Building Services | Consett

Contact us

Advice Center

Important Things To Know About The Party Wall Process

What is a party wall?  

A party wall is a dividing partition between two adjoining buildings that is shared by the occupants of each residence or business.  

The party wall act –  

The party wall act 1996 applies to houses in England and Wales and was devised to prevent building work that could compromise the structural integrity. The act can be used to stop disputes between neighbours and to help resolve them if they should arise.  

Overview –  

You must tell your neighbours if you want to carry out any building work near or on your shared property boundary.  

Party walls stand on the land of 2 or more owners and either:  

  • Form part of a building  
  • Don’t form part of a building, such as a garden wall  

Walls on one owner’s land used by other owners to separate their buildings are also party walls.  

Party wall agreement –  

You must tell your neighbours and provide them with a notice and come up with an agreement in writing. If you use a builder or an architect, they can advise you on this. 

Once you’ve given notice your neighbour can:  

  • Give consent in writing  
  • Refuse consent  
  • Serve a counter notice requesting additional works be done at the same time 

Your neighbours must let you know in writing within 14 days if they consent to your notice, and you must do the same with a counter-notice   

The following works require you to obtain a party wall agreement  

  • Any work to shared walls between semi-detached and terraced houses  
  • Work to garden boundary walls  
  • Loft conversions that mean cutting into the wall  
  • Making party walls thicker or higher  
  • Building a second storey extension above a shared wall  
  • Building a new wall up to or off the party wall  

What happens if a neighbour ignores the act – 

If an adjoining owner doesn’t respond, then you may appoint a surveyor to act for the adjoining owner. The act allows you to do this without having any further discussion with a neighbour.  

What is a Party Wall?

Contact us